Hebrew Setup
Israeli AS/400 systems use EBCDIC code page 424 for Hebrew characters. This tutorial walks through setting the correct CCSID, enabling right-to-left screen display, using bidirectional copy, and displaying Hebrew PF-key labels in IMTerm.
Open a new connection
Click File > New Session (or Ctrl+N) to open the New Connection dialog.
Choose TN5250
Click the TN5250 card. Hebrew sessions on IBM i always use TN5250, not TN3270.
Set the CCSID to 424
In the CCSID dropdown, choose 424 - Hebrew. Use 803 if your system uses the old CCSID 803 encoding (less common). Leave the default (37) only for US-English sessions.
Enter host and port, then connect
Type your AS/400 hostname in the Host field, confirm the port is 23 (or 992 for TLS), and click Connect.
Sign on and navigate to a Hebrew screen
Sign on as usual (Tab to Password, Enter) and navigate to a screen that contains Hebrew text, such as a customer list or name-entry screen.
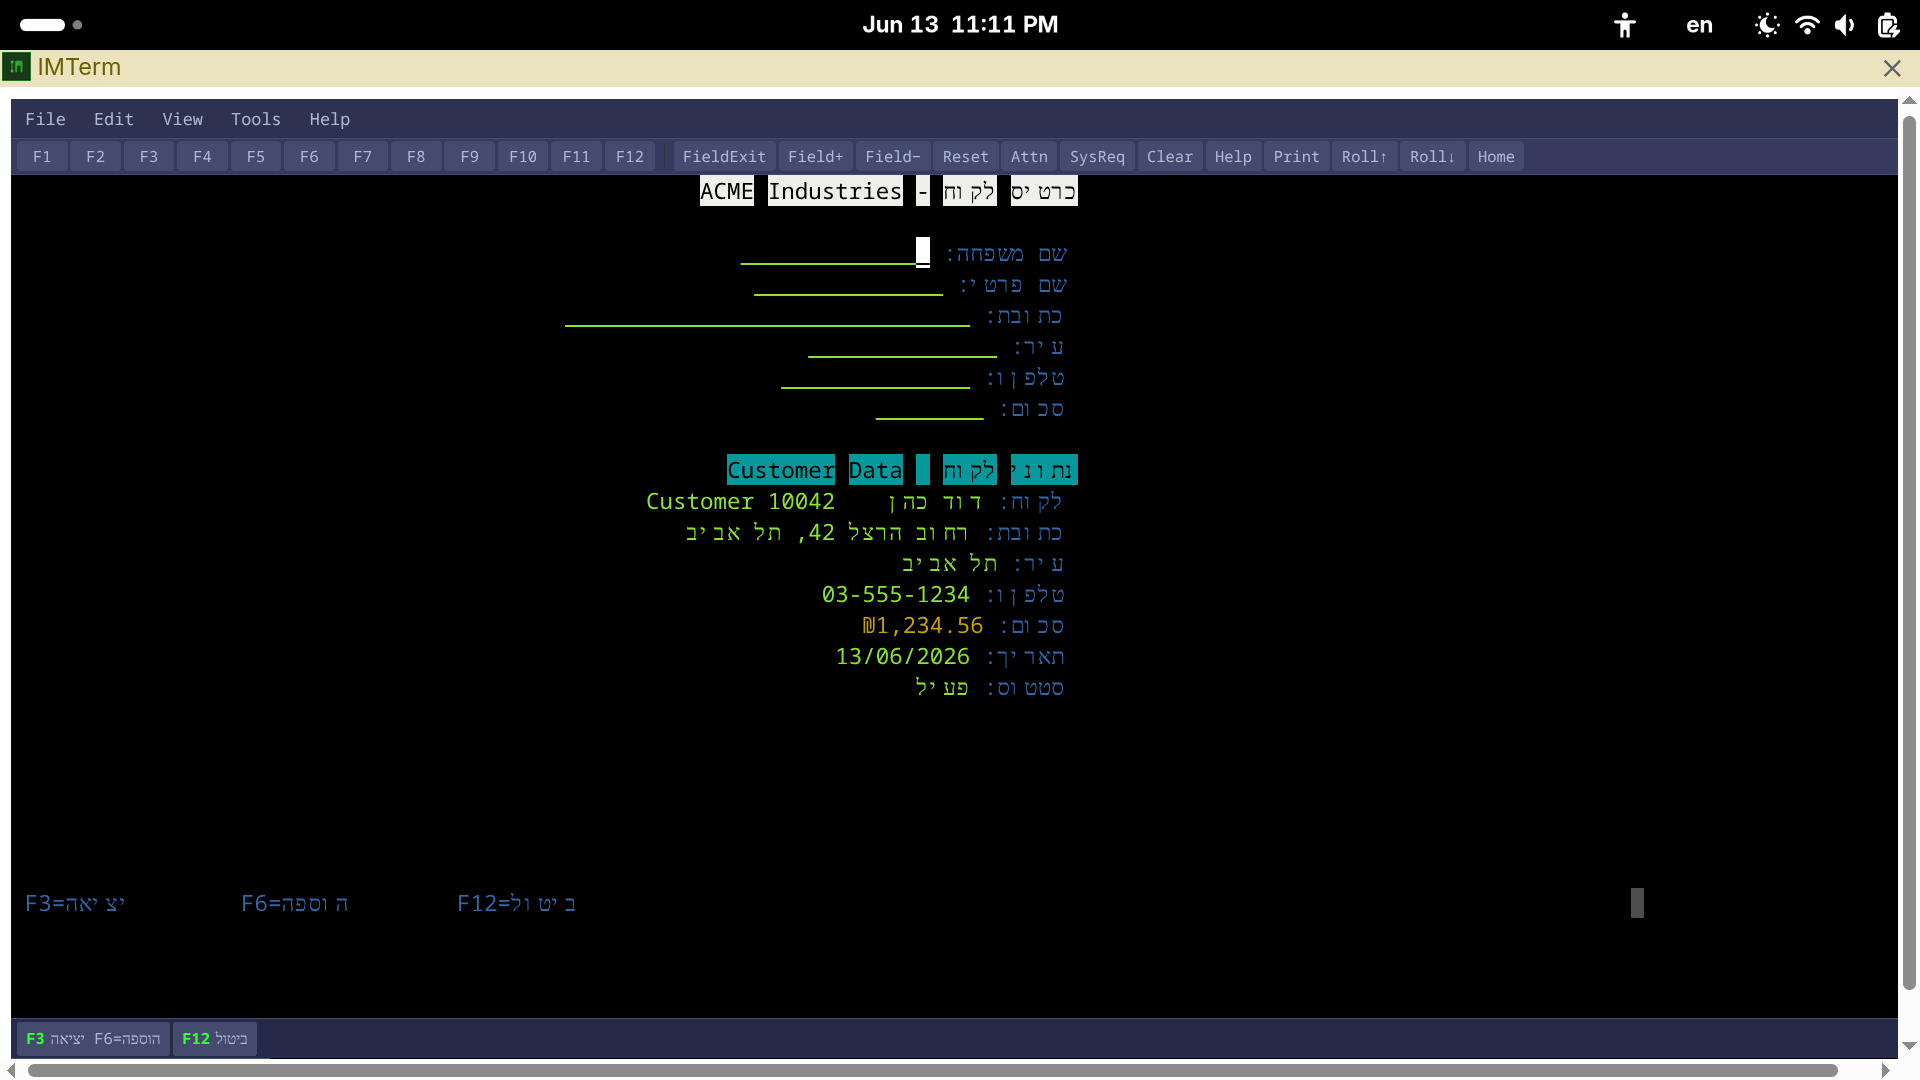
Enable Screen Reverse for right-to-left display
Click View > Screen Reverse, or press Ctrl+Shift+R. This mirrors the screen layout so Hebrew text flows naturally from right to left.
Copy Hebrew text correctly with Copy RTL
Select text on the screen by clicking and dragging. Then go to Edit > Copy Right to Left to copy with the character order reversed, which pastes correctly into Hebrew word processors and email clients.
Display Hebrew PF-key labels
IMTerm can label the PF-key toolbar buttons in Hebrew. To enable this, connect with CCSID 424 and ensure View > PF Toolbar is checked. The toolbar labels automatically switch to Hebrew (F1=עזרה, F3=יציאה, F4=הצג רשימה, etc.) when the session CCSID is 424 or 803.